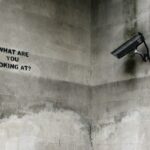
How to Install Wireless Security Camera System at Home

Home is heaven for every person, and we all want to keep our home secure from different threats.
What if someone barges into your private space and steals all your belongings? THAT is a major threat for homeowners.
Typically, workplaces are considered more prone to security problems. Unfortunately, nowadays, various criminal activities target people at home. Moreover, if you want to monitor your children while you are out at work, some indoor wireless cameras may be handy.
Their setup is cheaper as you do not require cables to connect it. Moreover, you do not need to spread a wired network on your property. Therefore, you can set it up without the help of an electrician.
Although setting up a camera may seem difficult, but it’s not as difficult as it sounds, especially when dealing with a wireless security camera.
Step by Step Guide
Even though installing a wireless camera isn’t troublesome, yet we have compiled a step by step manual to make it simpler for you. If you adhere to the guidelines beneath, you can install your wireless surveillance camera at your home without taking the assistance.
- First of all, you have to plan where you need your wireless camera to be installed. The position can be changed later anyway, but it’s smarter, to begin with choosing it.
- Planning installation of the wireless camera requires significant attention with regards to your security needs. You have to ensure that your wireless camera is fitting in a place where it is easy for it to cover the region you need to monitor.
- As this is a security concern, many factors need to be considered before choosing a place to install your wireless camera. Mostly it is recommended to select the highest position possible.
- Once you have found an appropriate place, the mounting bracket on the wall will mark the holes for the screws. It will help you fix them in the right position.
- The next thing that you need to do is to drill holes for the screws to fit in. Make sure that you choose a smaller bit than the screws; this will help to drill holes with less wall damage.
- After drilling the holes, lift the mounting bracket and hold it against the wall. Adjust the position to match the holes.
- Once it is in the correct position, you can embed the screws to give the mounting bracket a stronghold on the wall.
- Once the bracket is set up, all you need to do is to fit the camera and then insert the batteries to make the camera work.
- To connect the camera to your system, you need to read the instructions on the manual of your camera. Directions can be different for different brands and types of wireless security cameras.
Changing the Location
If you wish to change the spot on which your camera is, that is easy too. All you have to do is remove the camera from the mounting bracket.
Now, unscrew the screws to remove the mounting bracket. Repeat the steps mentioned above to install the wireless camera on the new location.


Related Articles
Best 2 burner induction cooktop built-in
Cooking is an art that requires the right tools and equipment to...
Best Induction Cooktop for Large Pans
Induction cooktops have revolutionized the way we cook our food. With their...
Best Freestanding Induction Range
Cooking is an essential part of our lives, and having a reliable...

Best High-End Induction Range
When it comes to cooking, having the right equipment can make all...